Following on from Part 1 where I talked about the physical setting up, this post will talk look at the Google Apps Dashboard and the settings that are currently available. Be aware, this is Google. They change regularly. If it changes a lot, I will update this guide.
First off, you will need to login to your Google Apps Dashboard – www.google.com/a/yourdomainname.co.uk for example.
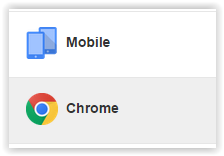
You will see an icon for Device Management. If this is not there, click More Controls at the bottom to bring it up.


Then you will see Mobile and Chrome. Next to each, there are links to Devices (takes you to Devices below, Settings (takes you to Device Settings) and Shipments (takes you to Advanced\Shipments). For this guide I am looking at the Chromebook setup rather than the Mobile one. I haven’t used the Mobile pages on Google Apps yet so I’m not sure how they work.

Clicking Chrome will show this screen:

The top number on this page shows the amount of active users within the last 7 days. Below I’ll try to explain each page of the menus is for and what it can do. I will also say which options we have turned on or off and which we have left. Obviously you can choose your own settings, but this is what we have done. If the settings aren’t mentioned below (there are a lot) then we have left them alone. I have tried to just mention the main ones.
This page gives you the choice of various options for the users within your domain. You can choose a default wallpaper for example.
>>>>Pre-installed Apps and Extensions – Chrome has apps. Lots of them in fact. Now there is a way of managing some of these by pre-installing them onto the devices. Simply click Manage and then search for apps to install onto every chromebook.

>>>>Security – We have chosen to never lock the screen when it is idle and to disallow incognito mode but these are minor things for us. We also don’t save the browser history either. We have prevented users from proceeding to malicious sites and allowed sites to detect users’ geolocation just to prevent sites from asking! I’m not sure if this is the best option, but it stopped a few errant pop-ups.
>>>>Startup – We have added the Home button to all chromebooks. This makes it much easier to get to the school website, especially for younger children. We have also set the Homepage URL. We have a page setup – www.ridersschools.co.uk/children – that has links to various tools that we use so it’s easier to get to that and then navigate to other stuff. We have also set the Chromebooks to load that page and the Google homepage on startup. That covers most things that we the children will use.
>>>>URL Blocking – There is the option to block URLs from being accessed but our filtering does this anyway, so we have left this blank.
>>>>Bookmark Bar – We have enabled this to make it easier for students.

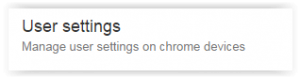
We haven’t changed anything on here as every user logs in to access the Chromebook so the settings on the menu above will apply.

>>>>Guest Mode – We have allowed this just in case there is ever an issue logging on (usually an incorrect username or password but so far no-one has needed it.
>>>>Power Management – We have told the devices to remain on if they are on the sign-in screen. We found that this was easier than trying to figure out if the device was off or asleep.
>>>>Auto Update Settings – We have set the Chromebooks to auto-update and these are scattered over a 14day period. This means, unlike Windows, updates will happen slowly rather than trying to update everything all at once. To be honest, we have yet to notice an update cause a problem. When an update gets downloaded, it is installed the next time the machine is turned off and on again. Easy.
>>>>Time Zone – We have set the time zone. It was confusing the children when it was on US time 🙂

This is where you can add your wireless settings so that the Chromebooks will automatically join the network. Click Add Wi-Fi, add the name, password, proxy settings etc and then save. The Chromebooks will now find the Wifi automatically. Adding the Wi-Fi here means that if you change the Wi-Fi password for example, you just need to tell the Chromebooks one rather than having to do it manually on every device.

This shows you the serial numbers for all of the devices that you have enrolled within your domain. It also shows if the device has been provisioned, when it was enrolled and by which user. There is also a notification of how many licenses you own and have used.


Errr…this page seems to show all of the other menus..but in one place. Not sure why it is there. There might be additional options, but they are not obvious! Ok, so shipments is on there. But that’s it.
So that is how we have set-up our Chromebooks. If you have any ideas for improving this, or you think I have missed a setting that is vital or if you have any questions then please add them in the comments below and I will amend this post accordingly.

Hi Ian
Do you need the management software installed / enabled before adding them to your google apps edu account?